


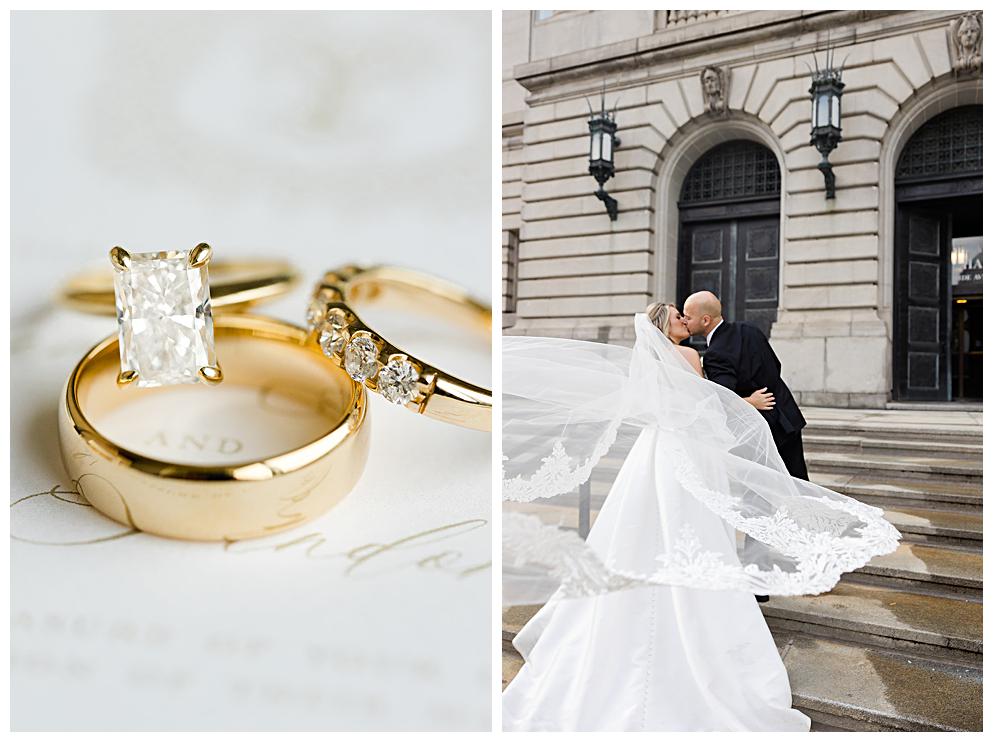
Ring shots are a must-have for wedding photographers. They provide an opportunity to showcase the intricate beauty of the couple’s rings and the level of detail you can capture as a photographer. Whether it’s the bride’s engagement ring, the wedding bands, or a creative arrangement with other details like flowers or personal items, a stunning ring shot can elevate your portfolio and wow your clients. But nailing the perfect wedding ring shot requires practice and an understanding of a few key techniques.
Robert and I actually have different rings now from what we had when we first got married and the only thing we have to showcase Robert’s now are the photos from our wedding.
In this blog post, we’ll walk through essential tips that will help you capture beautiful, sharp, and creative ring shots at weddings. These tips will ensure that your images stand out and leave a lasting impression.
Use Manual Focus for Precision
One of the biggest challenges when shooting rings is achieving tack-sharp focus. Rings are small, and their intricate details need to be in perfect focus to create a stunning shot. This is where manual focus comes into play and is so important.
Autofocus can sometimes struggle with tiny subjects like rings, especially when you’re shooting up close. If your camera’s autofocus is hunting or struggling to lock onto the right point, switching to manual focus gives you total control over where your focus lies. By manually adjusting the focus, you can ensure that the key details of the ring, such as the prong or the diamond, are crips and clear. We always focus on the prongs closest to us.
When using manual focus, take your time. Slowly adjust the focus ring while observing the magnified live view on your camera’s screen. This will allow you to see the sharpest focus point and lock it in before taking the shot. This technique is especially useful when working in low light or when shooting macro.
Choose the Right Lens (We Suggest a 100mm Macro)
For wedding ring shots, a macro lens is your best friend. A 100mm macro lens, such as the 100mm L from Canon, is an ideal choice for capturing close-up shots of wedding rings and other details. The macro lens allows you to get up close and personal with the ring, capturing every tiny detail with incredible sharpness and clarity.
The 100mm focal length also provides a beautiful compression, which can help isolate the ring from the background, creating a lean and focused image. This helps to bring attention solely to the rings and reduces distractions. If you don’t have a 100mm macro lens, another macro lens will still work well, but a true macro lens is crucial for capturing the small details of jewelry.
When using a macro lens, be mindful of your aperture settings. Shooting at a wider aperture (like f/2.8) first can create a shallow depth of field, which is great for achieving that dreamy, blurred background. However, be careful not to go too wide, as you still want enough depth to keep key elements of the ring in focus. Then we’ll try at a higher aperture like f/4.0 if the light allows.

Focus on the Prong Closest to You for the Wedding Ring Shot
When it comes to focusing on the ring, it’s important to choose the right focus point. A great tip is to focus on the prong of the ring that’s closest to you. This ensures that the front of the ring is sharp and in focus, which is typically the most important part of the image.
Since rings are small, even slight changes in focus can drastically affect the image’s sharpness. By focusing on the prong closest to you, you’ll achieve a more balanced depth of field and ensure that the ring appears sharp and detailed from the viewer’s perspective. Be careful with your aperture here, as shooting too wide may cause other parts of the ring to fall out of focus.
Keep Your Shutter Speed High (At Least 1/200)
When shooting close-up wedding ring shots, maintaining a faster speed is essential to avoid any motion blur. Even the slightest hand movement can result in a blurry image, especially when shooting macro. To prevent this, set your shutter speed to at least 1/200 or faster.
A fast shutter speed ensures that even if there’s a small amount of movement, your images will remain sharp and clear. If you’re shooting handheld, this becomes even more important. In low-light conditions, you might need to increase your ISO or open up your aperture to achieve a faster shutter speed without underexposing the image.
Hold Your Breath for Stability for the Wedding Ring Shot
Because ring shots often require extreme precision, even the slightest movement can cause blur, especially when shooting close-ups with a macro lens. To avoid this, hold your breath right before pressing the shutter button. This technique minimizes camera shake, allowing you to capture sharper images.
If you find that holding your breath isn’t enough, consider using a tripod for added stability. A tripod will keep your camera steady, allowing you to focus on composition and lighting without worrying about camera shake. Alternatively, use your camera’s burst mode to take several shots in quick succession — this increases your chances of getting the perfectly sharp image you’re looking for.
Face Toward the Light for Extra Sparkle
Lighting plays a huge role in ring shots. To capture the sparkle and brilliance of the ring’s diamond or gemstones, it’s important to use light to your advantage. Position yourself so that the ring is facing the light source — whether it’s natural sunlight, window light, or a soft artificial light.
When the ring faces the light, the facets of the diamond catch the light and create that beautiful sparkle that clients love. You don’t need to use harsh light for this effect — soft, diffused light often works best, as it reduces harsh shadows and creates a more natural, flattering look. If you’re indoors, find a window with soft, even lighting. Outdoors, the golden hour provides perfect lighting for these types of shots.
If you want to add even more sparkle to the ring, try using a small reflector or a piece of white paper to bounce light back onto the ring. This can enhance the shine of the diamond and create a more dynamic shot.
Get Creative with Composition
While technical aspects like focus and lighting are crucial, composition is where you can truly get creative with your ring shots. Think about how you can style the rings in a way that reflects the couple’s personality or the overall theme of the wedding. For example, you can place the rings on meaningful objects like wedding invitations, floral arrangements, or even heirloom items.
Another idea is to use the couple’s surroundings to enhance the shot. If the wedding is outdoors, consider incorporating natural elements like leaves, grass, or tree bark to add texture and context to the image. For indoor weddings, look for elegant backdrops such as polished wood tables, marble surfaces, or vintage trays.
Pay attention to lines, shapes, and symmetry in your composition. Placing the rings in the center of the frame creates a clean, minimalist look, while an off-center composition can add a more dynamic feel. Experiment with different angles, such as shooting from above, at eye level, or even from below, to capture unique perspectives.
Practice, Practice, Practice
Like any other skill in photography, mastering wedding ring shots takes time and practice. Don’t wait until the wedding day to try out these techniques. Practice with different rings in various lighting conditions and settings. This will help you become more comfortable with your equipment and the process so that when the time comes, you’ll be confident and prepared.
And if you want a guide to help you stay organized, shoot efficiently, and deliver a complete gallery (complete with a structured breakdown of each part of the day), check out our Wedding Day Shot List guide.

Courtney and Robert
We believe in grace, grit, giving more than you take, and that there are still kind-hearted people in this world.

the cannons belief statement


Get in touch
Ready to book your experience?
Courtney and Robert